
Before you start, you should know that bras are very fitted garments. This means that a little bit of error in the cutting can throw off the whole cup size. There are several ways to ensure that you cut the right size. Using pins to mark the dots on the pattern can help you determine where to cut.
Patterns
If you are considering making your own bra at home, there are several patterns available. One of the benefits of these patterns is that you can customize them according to your preferences. For instance, you can customize the size to fit your bust and waist measurements. You can also add an underbust band to give your bra more support.
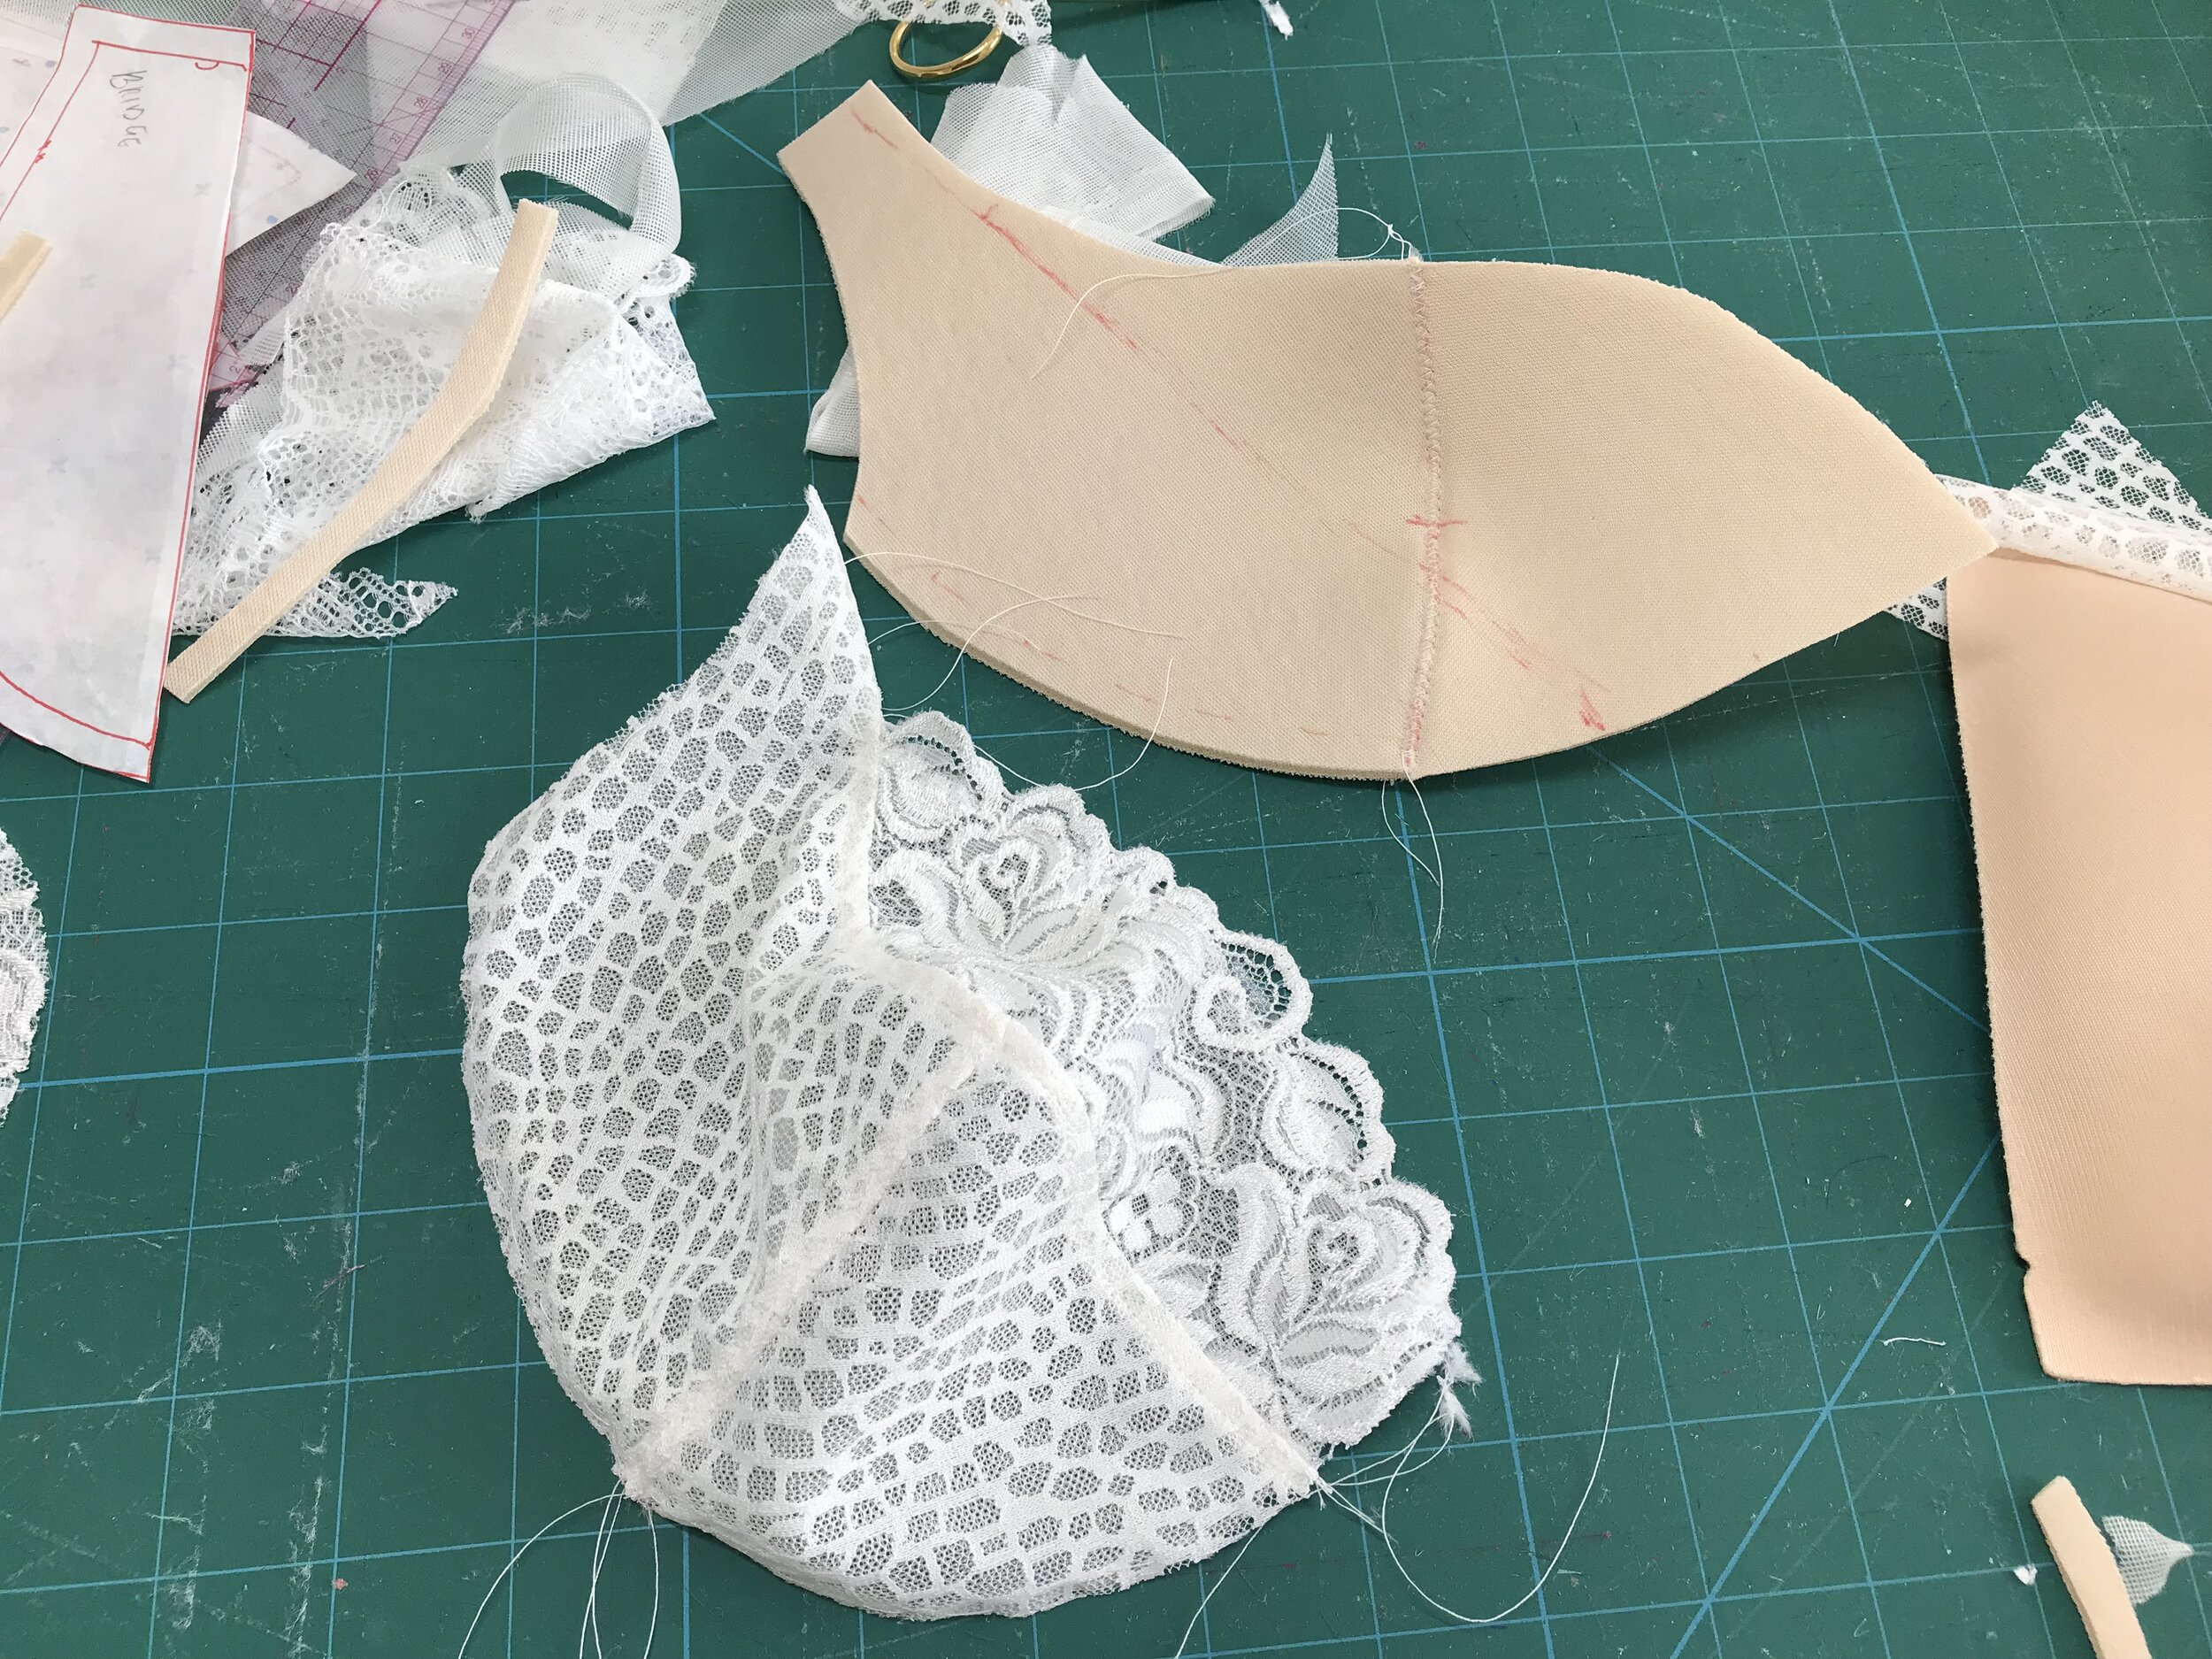
You can find different bra patterns that have different shapes and styles. When making your own bra, it is important to choose the right pattern for you. Make sure to trace the pieces carefully, and make sure that the pieces are the same length. Also, be sure to mark the grainlines and notches correctly. After determining the right pattern, prepare your materials and tools.
The next step is to cut the straps. If you choose to use a lace edge, make sure to turn the seam allowance under and tack it at the lower edge. Once the bra has been cut, you should sew the straps together. If you’ve cut them before, you can stitch them together in a zigzag. You can also reuse your old bra straps for your new bra.
Patterns for making a bra at home have become very popular over the past year. You can choose from a variety of styles and sizes. You can choose from a triangle bra pattern, which is suitable for those with small bust sizes. A free bra pattern is also available at Threads magazine.
When you’re using a paper pattern, make sure you cut the notches in it to make lining them up easier. When cutting delicate fabric, consider using a rotary cutter instead of scissors. It is also helpful to use a plastic cutting mat, which makes the task much simpler.
Another option is to make a muslin before sewing up your final bra. This step is essential for proper fitting of the bra. You can make a muslin before buying a pattern for the actual bra.
Fabric
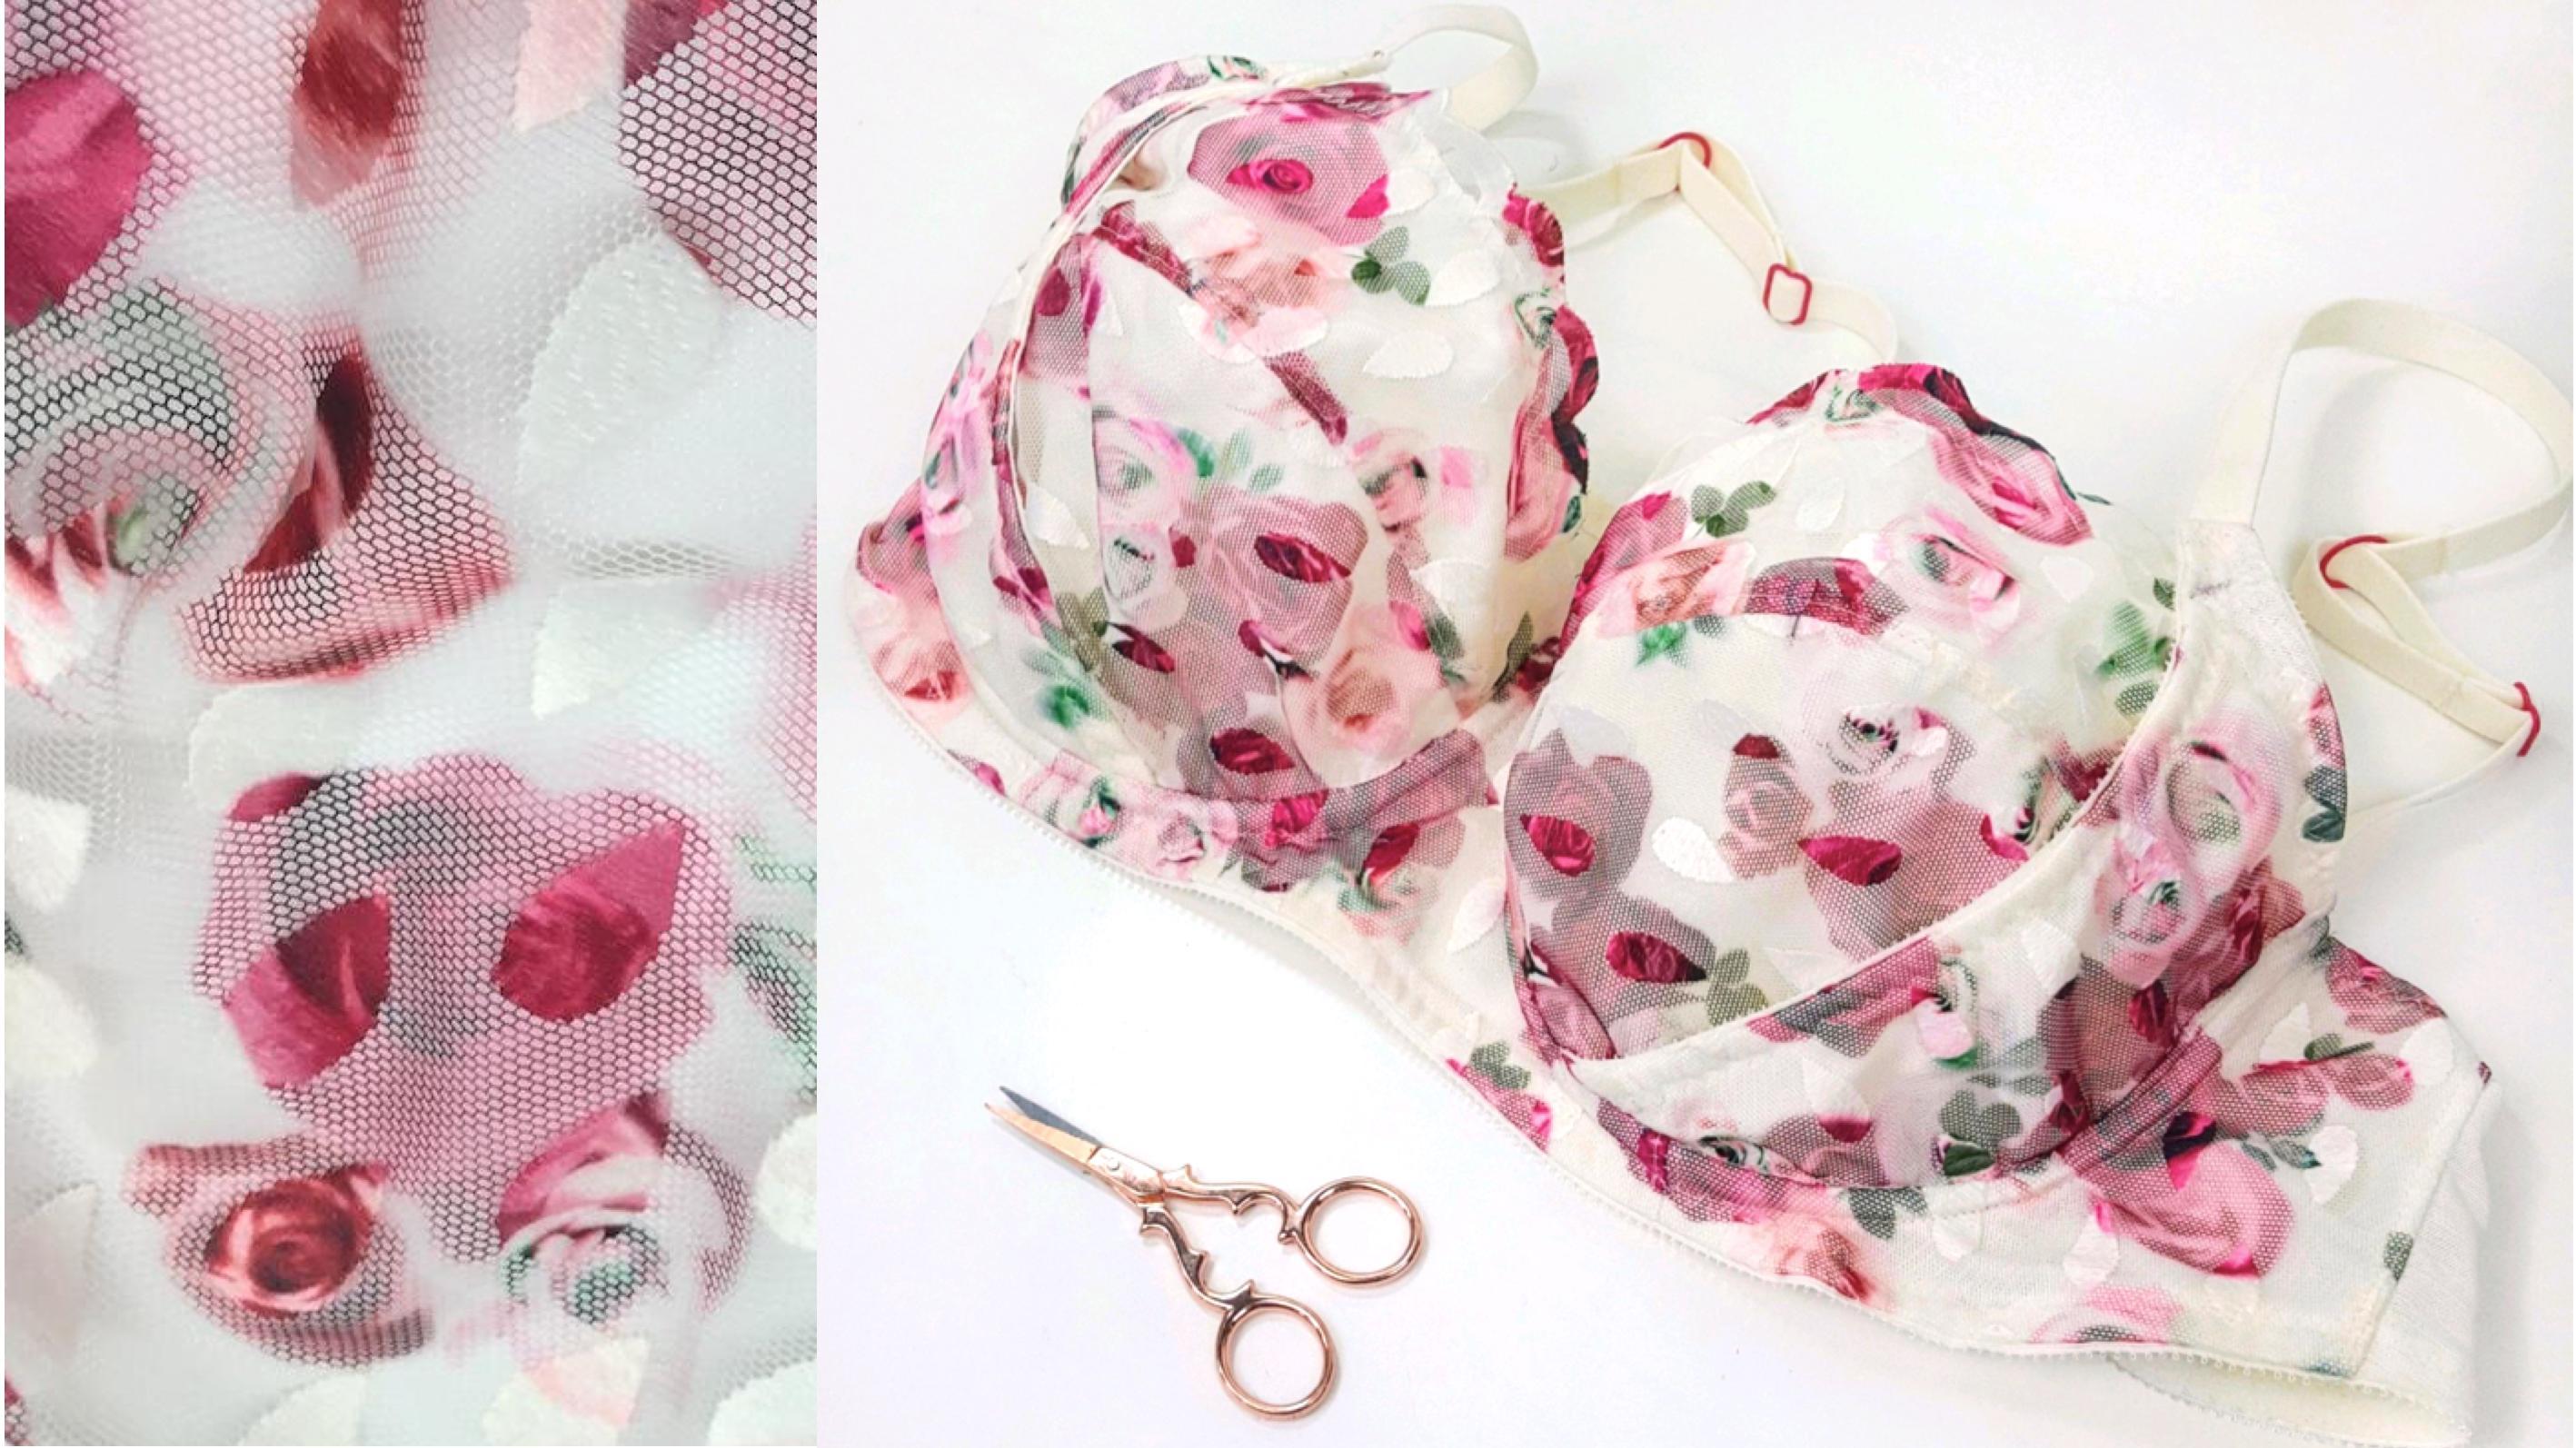
When making your own bra, you have a variety of options when choosing the fabric. Choose a fabric that offers smooth fit, breathability, and ease of care. You can choose between low-stretch and no-stretch fabrics. No-stretch fabrics don’t contain spandex, while low-stretch fabrics have some mechanical give from the knitting process. Cotton is a classic choice for making a bra because it is comfortable, soft, absorbent, and warm. It’s also widely available, affordable, and easy to care for.
If you’re looking for a fun project that you can complete quickly, you should consider making your own bra. It’s not difficult and can be a very satisfying experience. If you’re comfortable sewing, you should be able to make a bra that fits your needs perfectly.
If you’re a big-busted woman, you might want to make an upper or lower-cup bra. You can use a double-layer of fusible tricot knit, or use fusible web to join two layers. In addition to joining the two layers, you can also interface the bottom portion of the lower cup. You can then proceed with adding elastic and finishing the bra.
When making a bra at home, you need to make sure that you choose the correct strap width. Choosing a thick or thin strap will depend on your preference. A thicker strap will provide better support and comfort. Remember to measure and mark the pattern pieces for the straps. Then, consider the direction the straps will cover your bust and whether or not they’re too low.
Techniques
There are several techniques for making a bra at home. The first one involves choosing the right pattern for your bra. It is important to choose the right pattern for the type of fabric you plan to use. The bra pattern should be sized according to your cup size. The pattern should be laid out so that the edges are lined up properly. Using a rotary cutter and a plastic cutting mat will help you cut the delicate fabric with ease. Using pins on the pattern will ensure that the raw edges will not show through the elastic.
Once you’ve cut out the pattern for your bra, you need to attach the cups to them. Then, you need to attach the band to the bra cradle. If you don’t want to use the bra band, you can fold the cup under and sew it on the other side. It is important that you make sure that the straps are pressed towards the back band so that they don’t get out.
Before you start sewing your own bra, select a beginner pattern that is easy to follow. There are many bra patterns to choose from. You can even salvage the parts from your old bras to use for your first one. But make sure that the parts are in good condition. After you’ve decided on a pattern, ask questions about the instructions.
Before sewing the bra, make sure it fits well. Before sewing the band, you can mark the center front edge. Then, sew narrow satin stitches on the center front of the upper cup, 1/8 in from the top edge. You can also turn the channeling under before sewing it.
Another technique for making a bra at home is to purchase a muslin kit, which will help you measure your bra correctly. These kits are sold by companies like LilypaDesigns and Gigi’s Bra Supply.
